Disclaimer: This content is for educational purposes only, not medical advice. Always consult with a doctor before making significant changes to your diet, especially if you have pre-existing health conditions.
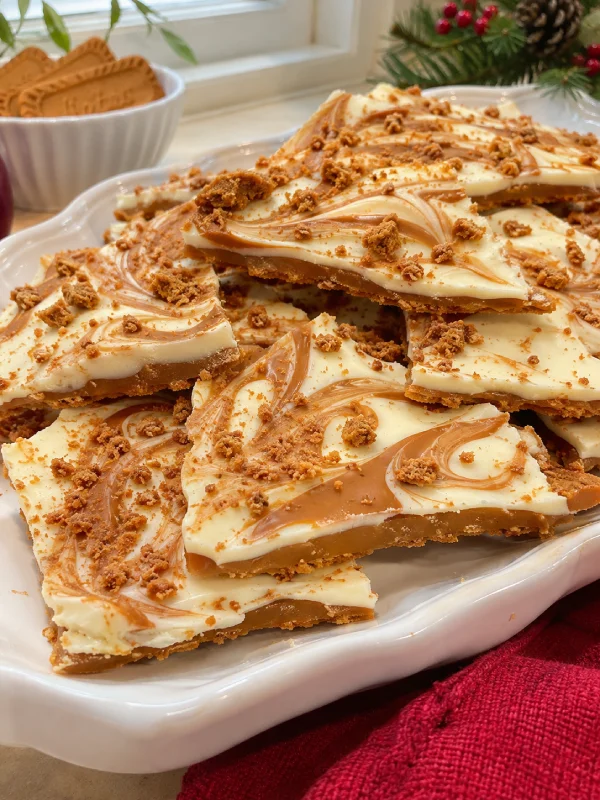
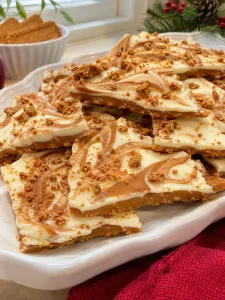
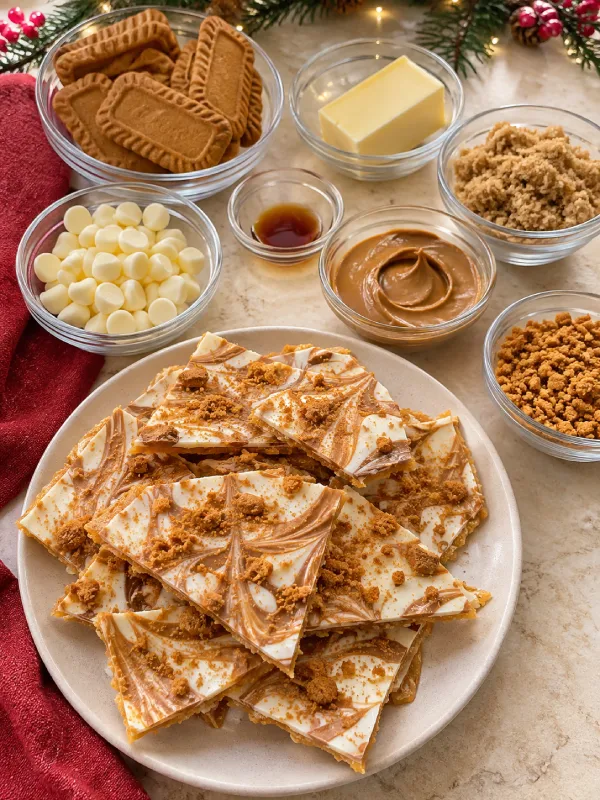
Biscoff Christmas Crack combines crisp caramelized cookies, buttery brown sugar toffee, creamy white chocolate, and ribbons of cookie butter. Once chilled, the slab breaks into irregular pieces with crunchy edges and a sweet, spiced finish.
It’s an easy dessert to make when you want something that feels special without shaping individual cookies. Arrange the Biscoff cookies in a pan, pour over the hot toffee, and give everything a short bake. Finish with white chocolate, swirl in warm cookie butter, and scatter crushed cookies over the top.
The marbled surface makes each piece look a little different. Pack a handful into a holiday gift box or pile the pieces on a white platter for a Christmas gathering.
For a dessert table with contrasting textures, serve it alongside powdered sugar cookies and colorful vanilla wreaths. Melting Moment Logs and Christmas Swirl Wreath Cookies.
IN THIS ARTICLE
What Is Biscoff Christmas Crack?
Biscoff Christmas Crack is a cookie toffee bark made with Biscoff cookies as the base. A mixture of butter and brown sugar bubbles over the cookies in the oven, then sets beneath a layer of chocolate.
This version uses white chocolate and smooth cookie butter for the topping. The white chocolate creates a pale background for the caramel-colored swirls, while crushed Biscoff cookies add texture.
The finished dessert should be firm enough to break into pieces when cold. You’ll see distinct layers of cookie, toffee, and chocolate along the broken edges.
If you’re planning a larger holiday spread, add a chilled dessert that you can prepare the evening before. Christmas Cookie Lasagna.
Why You’ll Love This Recipe
- Seven main ingredients. The topping uses extra cookies from the same package.
- Simple assembly. Build the dessert in one pan.
- Easy portions. Break the chilled slab into pieces of any size.
- Festive appearance. White chocolate and cookie butter create a marbled finish.
- Convenient gifting. Pack the firm pieces between sheets of parchment.
Biscoff Christmas Crack also works well as part of a dessert sampler. Keep the pieces small so guests can try a few different treats.
Individual cheesecake cups make a creamy addition beside the crunchy toffee pieces. Christmas Tree Cake Dessert Cups.
Ingredients for Biscoff Christmas Crack
Biscoff Cookies
Use crisp, original Biscoff cookies. You’ll need enough to cover the bottom of a 9 × 13-inch pan in a single layer, usually around 24 cookies depending on their size and arrangement.
Break a few cookies to fill narrow gaps. Reserve additional cookies for crushing over the topping.
A standard 8.8-ounce package should provide enough for the base and garnish, but check the package size when shopping.
Unsalted Butter
Butter gives the toffee richness and helps the brown sugar mixture spread over the cookies.
Use regular unsalted butter. Cut it into pieces so it melts evenly before the mixture begins to boil.
Light Brown Sugar
Packed light brown sugar provides sweetness and a mild molasses flavor.
Measure it firmly into the cup, then transfer it to the saucepan with the butter. Break up hard lumps so the mixture heats evenly.
For accurate measurements of common baking ingredients, a weight chart is helpful when you want to use a kitchen scale. King Arthur Baking’s ingredient weight chart. www.kingarthurbaking.com
Vanilla Extract
Add the vanilla after removing the saucepan from the heat.
It rounds out the caramel flavor and complements the spiced cookies. Stir it in carefully because the hot mixture may bubble briefly.
White Chocolate
Use 12 ounces of white chocolate chips or finely chopped white baking chocolate.
Some chips hold their shape even after softening, so test them with a spatula before adding more heat. Finely chopped baking chocolate generally spreads more easily.
Smooth Cookie Butter
Warm the cookie butter just enough to make it pourable.
Smooth Biscoff spread creates the cleanest swirls. It is made from the brand’s original cookies, which brings the same caramelized cookie flavor into the topping. Lotus Biscoff spread information. Lotus Biscoff
Crushed Cookies
Crush the topping cookies into a mixture of fine crumbs and small pieces.
Sprinkle them over the wet topping so they adhere as it sets. Keep a few larger crumbs for a more textured appearance.
How to Make Biscoff Christmas Crack
1. Prepare the Pan
Preheat the oven to 350°F.
Line a 9 × 13-inch metal baking pan with foil, extending it over the sides to create handles. Lightly grease the foil.
Arrange the cookies across the bottom in a close-fitting single layer. Fill small gaps with broken pieces.
2. Cook the Butter and Brown Sugar
Place the butter and packed brown sugar in a medium, heavy-bottomed saucepan.
Heat over medium heat, stirring until the butter melts and the mixture comes together.
Bring it to a steady boil across the surface. Start timing at this point and cook for 3 minutes, stirring gently and regularly.
Remove from the heat and carefully stir in the vanilla.
3. Cover the Cookies
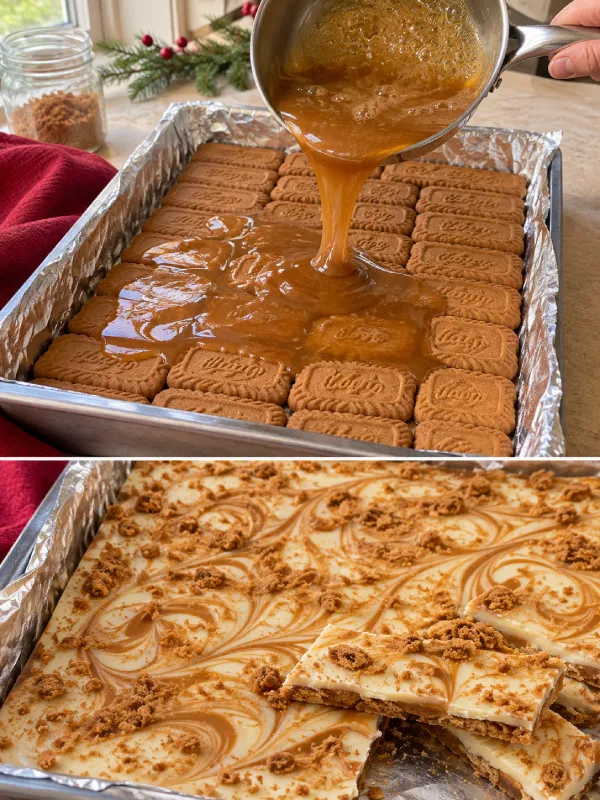
Immediately pour the hot mixture evenly over the cookie layer.
Use a heatproof spatula to guide it toward the corners. Work gently so the cookies stay in place.
The mixture will spread further during baking.
4. Bake Until Bubbling
Bake for approximately 5 to 7 minutes, until the toffee bubbles across most of the surface.
Watch closely near the end. Remove the pan if the edges begin darkening rapidly.
Place the hot pan on a heatproof surface.
5. Add the White Chocolate
Let the pan stand for about 2 minutes, then scatter the white chocolate evenly over the hot toffee.
Wait another 3 to 5 minutes for the chocolate to soften.
Spread gently with an offset spatula. If it remains firm, return the pan to the oven for about 30 seconds, then check again.
6. Swirl the Cookie Butter
Warm the cookie butter in a microwave-safe bowl in short intervals until pourable.
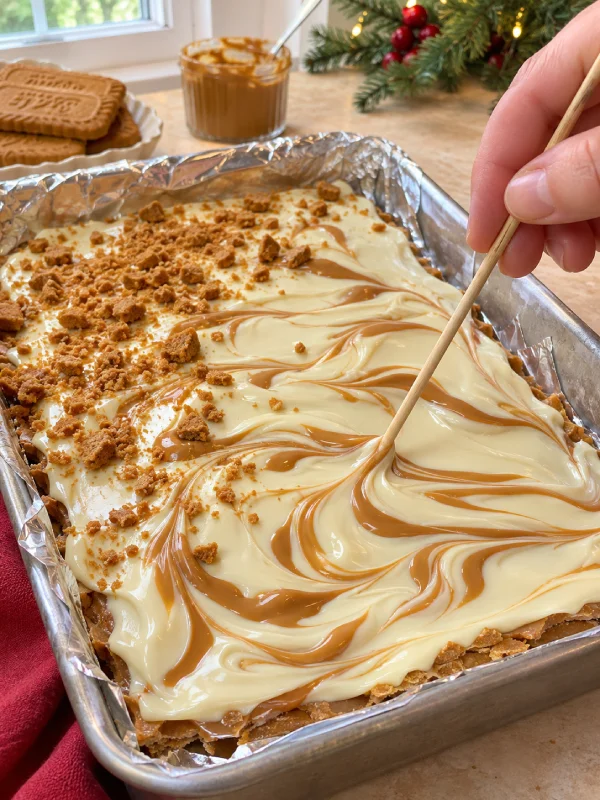
Drizzle it over the white chocolate. Draw a skewer or toothpick through the topping a few times to create loose swirls.
Stop while the two colors are still distinct.
7. Add Crumbs and Chill
Scatter crushed cookies over the wet topping.
Let the pan cool on a rack for about 20 minutes, then refrigerate for at least 1 hour, until completely firm. A thick layer may need longer.
8. Break into Pieces
Lift the chilled slab from the pan using the foil handles.
Peel away the foil and break the Biscoff Christmas Crack into pieces. For more regular portions, use a large knife to cut the cold slab on a cutting board.
Serve with a familiar cookie favorite if you’re building a holiday platter. Classic chocolate chip cookies.
Tips for Biscoff Christmas Crack
Use the Specified Pan Size
A larger pan spreads the ingredients more thinly and requires more cookies.
A smaller pan produces thicker layers that can take longer to set. Use the 9 × 13-inch pan for the quantities below.
Start Timing After the Mixture Boils
The butter must melt and the sugar mixture must reach a steady boil before you begin the 3-minute timer.
Keep the heat moderate so the bottom of the mixture doesn’t scorch.
Keep the Chocolate Layer Thin and Even
Spread softened chocolate gently across the surface.
An even coating is easier to break and gives each piece a balanced combination of cookie, toffee, and topping.
Swirl with a Light Hand
A few passes with a skewer are enough.
Overworking the topping blends the cookie butter into the white chocolate and softens the marbled pattern.
Chill Until Fully Firm
Biscoff Christmas Crack should feel firm through the center before you lift it from the pan.
If the topping bends or smears, give it more time in the refrigerator.
For a holiday tin with several textures, pair the pieces with nutty cookies. Coconut pecan cookies.
Flavor Variations
Dark Chocolate
Replace the white chocolate with an equal weight of dark chocolate.
The darker coating provides a stronger cocoa flavor alongside the sweet toffee and cookie butter.
White and Dark Chocolate
Use 8 ounces of white chocolate for the main layer and drizzle with 4 ounces of separately melted dark chocolate.
Add the cookie butter sparingly so the surface retains a clear pattern.
Salted Cookie Butter
Finish the wet topping with a small pinch of flaky salt.
Scatter it lightly over the slab so it complements the sweetness.
Christmas Sprinkle Topping
Add a tablespoon of small red and green sprinkles with the cookie crumbs.
For another colorful baking project, use the remaining sprinkles in a batch of cookies. Cake mix cookies.
Make-Ahead and Storage Tips
Make Biscoff Christmas Crack one or two days before serving.
Once fully set, break it into pieces and store in an airtight container in the refrigerator for up to one week. Place parchment between layers to protect the topping.
Serve chilled or let the pieces stand for a few minutes before eating. The cookie butter topping will soften as it warms.
For longer storage, freeze in a tightly sealed container for up to one month. Thaw in the refrigerator before opening the container.
If you’re preparing several treats ahead, chewy cookies provide another option for the dessert box. Oatmeal raisin cookies.
How to Package It for Gifts
Let every piece firm completely before packing.
Choose a shallow tin or food-safe box and line it with parchment. Arrange the pieces in layers, placing another sheet of parchment between them.
Keep the gift refrigerated until you’re ready to hand it over, and let the recipient know to store it chilled.
For more ideas to fill a mixed gift box, browse the cookie archive. We Post Recipes cookies.
Frequently Asked Questions
Why Is My Biscoff Christmas Crack Soft?
The slab may need more chilling, or the toffee may have needed more cooking. Refrigerate until completely firm before breaking it.
Follow the stovetop and oven cues carefully on the next batch.
Why Did My Butter and Sugar Separate?
The mixture may have heated unevenly or become too hot.
Use moderate heat and stir gently as the ingredients melt. If it separates badly, remake the toffee before pouring it over the cookies.
Can I Use Crunchy Cookie Butter?
Yes. Crunchy cookie butter adds small cookie pieces to the topping.
Warm it gently so it drizzles more easily. The swirls will have a more textured appearance.
Can I Use Milk Chocolate?
Yes. Replace the white chocolate with an equal weight of milk chocolate.
Spread it over the hot toffee using the same method.
Can I Make Biscoff Christmas Crack Without an Oven?
This recipe uses baking to finish the toffee layer over the cookies.
For a version made entirely on the stovetop, use a recipe developed specifically for that method, since the cooking stage would need adjusting.

Melting Moment Logs
Ingredients
Equipment
Method
- Line two baking sheets with parchment paper and set them aside. Prepare a wire cooling rack and a small fine-mesh sieve for dusting the finished cookies with powdered sugar. Measure all ingredients before mixing, keeping the powdered sugar for the dough separate from the powdered sugar for decorating.
- In a medium mixing bowl, whisk together 1 1/2 cups (approximately 180 grams) of all-purpose flour, 1/2 cup (approximately 60 grams) of cornstarch, and 1/4 teaspoon of fine salt. Break up any visible lumps, especially in the cornstarch, and mix until the dry ingredients are evenly combined. Set the bowl aside.
- Place 3/4 cup (approximately 170 grams) of softened unsalted butter and 1/2 cup (approximately 60 grams) of powdered sugar in a large mixing bowl. Beat with an electric mixer on medium speed for approximately 2 minutes, until the mixture is smooth, creamy, and slightly lighter in color. Scrape the sides and bottom of the bowl, then add 1 teaspoon of vanilla extract and mix until completely incorporated.
- Add the prepared flour, cornstarch, and salt mixture to the creamed butter in two additions. Mix on low speed just until the dough begins to gather. Finish mixing with a flexible spatula, gently pressing the mixture together until a soft, cohesive dough forms. Avoid overmixing. If the dough seems crumbly, squeeze a small portion in your hand to check whether it holds together, then press the remaining dough into one mass.
- Divide the prepared dough into 24 equal portions, approximately 20 grams each. Shape every portion into a short, thick cylinder about 1 1/4 inches wide and 3/4 inch tall. Gently flatten the top and smooth the rounded sides with your fingertips. Arrange the cookies approximately 2 inches apart on the prepared baking sheets. Keep the portions evenly sized so they bake consistently.
- Refrigerate the shaped Melting Moment Logs for 30 minutes to help them maintain their shape during baking. While the dough chills, preheat the oven to 325°F (163°C). Keep the second tray refrigerated while the first tray is baking. If the shaped dough becomes sticky or greasy, refrigerate it until firm before placing it in the oven.
- Bake one tray at a time on the middle oven rack at 325°F (163°C) for approximately 18 to 22 minutes, beginning to check at 18 minutes. The cookie surfaces should appear dry and set, while the bottoms should be lightly golden and the tops remain pale. Carefully lift one cookie with a thin spatula to check the underside near the end of baking. Remove the tray from the oven and let the cookies rest on the baking sheet for 10 minutes. Transfer them carefully to a wire cooling rack and allow them to cool completely before decorating.
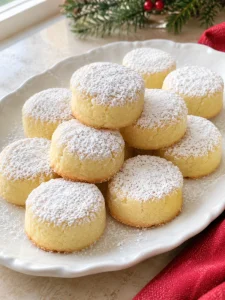
- Arrange the completely cooled Melting Moment Logs on parchment paper or a serving plate. Place approximately 1/4 cup of powdered sugar in a fine-mesh sieve and dust it generously over the tops of the cookies. Allow the sugar to settle into the small surface cracks to create a snowy appearance. Serve immediately or store in an airtight container at cool room temperature with parchment between layers. If preparing the cookies ahead, add another light dusting of powdered sugar just before serving.
Notes
More Holiday Dessert Ideas
Biscoff Christmas Crack brings crunch, caramel flavor, and a marbled white chocolate finish to a Christmas dessert platter. Make it ahead, chill until firm, and break it into small pieces for sharing or gifting.
Find more treats to serve alongside it in the dessert collection. Dessert & Baking recipes.