Disclaimer: This content is for educational purposes only, not medical advice. Always consult with a doctor before making significant changes to your diet, especially if you have pre-existing health conditions.
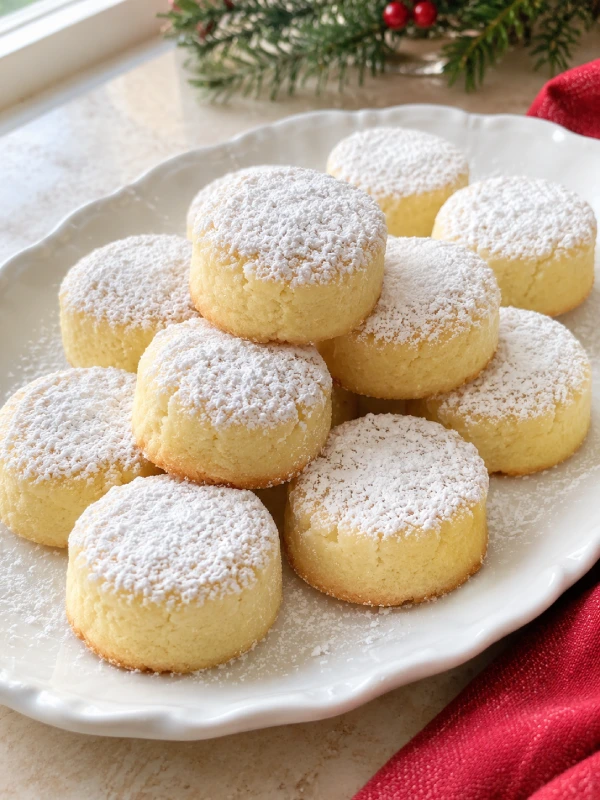
Melting Moment Logs are tender, buttery vanilla cookies with a thick, rounded shape and a snowy coating of powdered sugar. Their lightly golden bases support a delicate crumb that breaks apart easily with each bite. A small amount of cornstarch helps create that soft, melt-in-your-mouth texture.
These cookies come together with a short list of ingredients and a simple shaping method. Roll small portions of dough into thick little cylinders, chill them, and bake until the surfaces look set. Once cooled, finish them with a generous dusting of powdered sugar.
Serve Melting Moment Logs with coffee after Christmas dinner, tuck them into holiday gift boxes, or arrange them on a plate for an afternoon treat. Their pale golden color and snowy tops fit beautifully among brighter holiday cookies.
For a platter with several textures, add chewy chocolate chip cookies and a few nutty favorites. Classic chocolate chip cookies and coconut pecan cookies.
IN THIS ARTICLE
What Are Melting Moment Logs?
Melting Moment Logs are small butter cookies made with flour, cornstarch, powdered sugar, and vanilla. This version follows the thick shape in the reference photo, with rounded edges, gently flattened tops, and powdered sugar scattered over the surface.
The dough contains a generous amount of butter, which gives the cookies their rich flavor. Cornstarch contributes to the fine crumb, while powdered sugar blends smoothly into the dough.
As the cookies bake, the bottoms turn lightly golden while the tops stay pale. Letting them cool before handling helps preserve their delicate shape.
If you enjoy buttery cookie bases, fruit bars make another good addition to your baking plans. Rhubarb shortbread bars.
Why You’ll Enjoy This Recipe
- Everyday ingredients. Butter, flour, cornstarch, and powdered sugar form the base.
- Simple shaping. Shape each cookie by hand with gentle pressure.
- Easy decorating. A dusting of powdered sugar gives the cookies their finished appearance.
- Convenient preparation. Make the dough ahead and bake when you have time.
- Small portions. The thick cookies fit comfortably into gift tins and dessert boxes.
Melting Moment Logs also suit a relaxed baking afternoon. You can prepare the dough while another batch of cookies cools, then use the chilling time to clear the counter.
For another straightforward recipe to include in the same baking session, try cake mix cookies. Cake mix cookies.
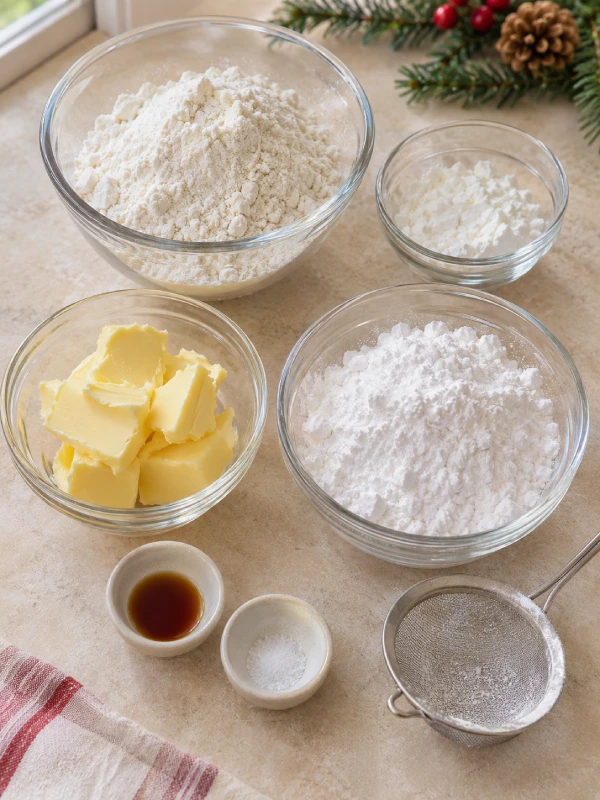
Ingredients for Melting Moment Logs
Unsalted Butter
Use softened butter that still holds its shape. Press it gently with a finger. It should leave an indentation while feeling slightly cool.
Butter that is too firm can leave small lumps in the dough. Very warm butter makes the mixture sticky and allows the cookies to spread more readily.
If you use salted butter, omit the added salt.
Powdered Sugar
Powdered sugar sweetens the dough and gives the finished cookies their snowy topping. Sift it first if it contains firm lumps.
Its fine texture helps it blend smoothly with the butter. Commercial powdered sugar also usually contains a small amount of starch to prevent clumping. King Arthur Baking’s guide to baking sugars. www.kingarthurbaking.com
Keep the sugar for dusting separate from the amount measured for the dough.
All-Purpose Flour
Flour provides enough structure for Melting Moment Logs to hold their thick shape.
For consistent results, weigh the flour. If using measuring cups, fluff the flour, spoon it lightly into the cup, and level the top.
Packing flour into the cup can produce a dry dough that cracks during shaping. A baking weight chart can help when measuring flour and other powdered ingredients. King Arthur Baking’s ingredient weight chart.
Cornstarch
Cornstarch helps give these cookies their delicate texture. Whisk it thoroughly with the flour so it distributes evenly through the dough.
Check the container carefully when measuring. In US recipes, cornstarch refers to the fine white starch used for thickening.
Vanilla Extract and Salt
Vanilla complements the butter, while a small amount of salt balances the sweetness.
For a gentle citrus variation, add finely grated lemon zest. You can also serve the vanilla cookies alongside a tangy cheesecake cookie for a wider range of flavors. Lemon cheesecake cookies.
How to Make Melting Moment Logs
1. Prepare the Baking Sheets
Line two baking sheets with parchment paper. Set out a cooling rack and a small sieve for dusting the finished cookies.
Measure the ingredients before mixing. This makes it easier to bring the dough together without stopping partway through.
2. Mix the Dry Ingredients
Whisk the flour, cornstarch, and salt in a medium bowl.
Break up visible lumps, especially in the cornstarch. An evenly mixed dry mixture helps create a consistent crumb.
3. Beat the Butter and Sugar
Beat the softened butter and powdered sugar on medium speed for about 2 minutes, until smooth and creamy.
Scrape the sides and bottom of the bowl, then mix in the vanilla. Aim for a uniform mixture with no visible pieces of butter.
4. Bring the Dough Together
Add the dry ingredients in two additions, mixing on low speed until the dough begins to gather.
Finish with a spatula, gently pressing the mixture together. The dough for Melting Moment Logs should feel soft and cohesive.
If it looks crumbly, squeeze a small portion in your hand. If it holds together, give the dough a few gentle presses to bring it into one mass.
5. Shape the Cookies
Divide the dough into 24 portions, approximately 20 grams each.
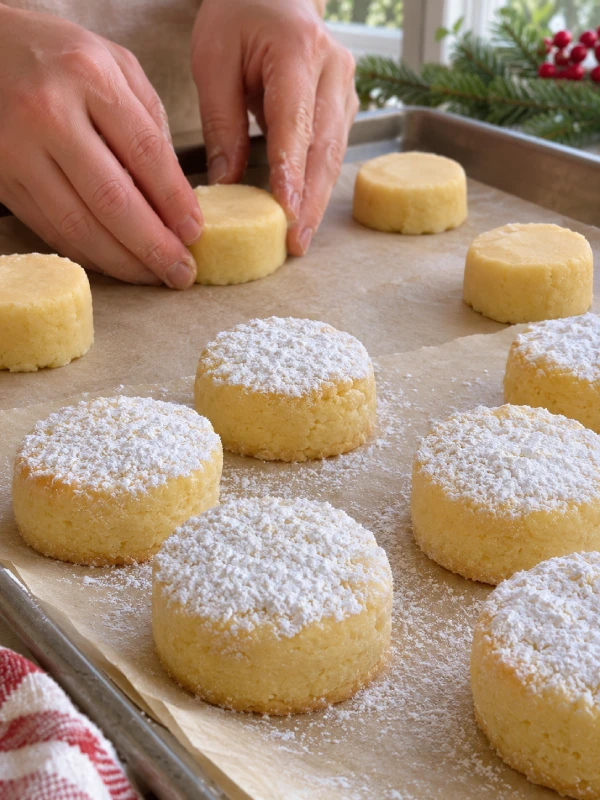
Shape each portion into a short, thick cylinder, about 1¼ inches wide and ¾ inch tall. Gently flatten the top and smooth the sides with your fingertips.
Place the cookies about 2 inches apart on the prepared sheets. Keeping the portions evenly sized helps the batch bake consistently.
6. Chill the Shaped Dough
Refrigerate the trays for 30 minutes.
While the dough chills, preheat the oven to 325°F. Keep the second tray refrigerated while the first tray bakes.
7. Bake and Cool
Bake Melting Moment Logs on the middle rack for approximately 18 to 22 minutes. Begin checking at 18 minutes.
The surfaces should look dry and set. The bottoms should be lightly golden, and the cookies should retain their pale tops.
Let them rest on the baking sheet for 10 minutes. Transfer carefully to a rack using a thin spatula, then cool completely.
8. Add the Powdered Sugar
Arrange the cooled cookies on a plate or parchment paper.
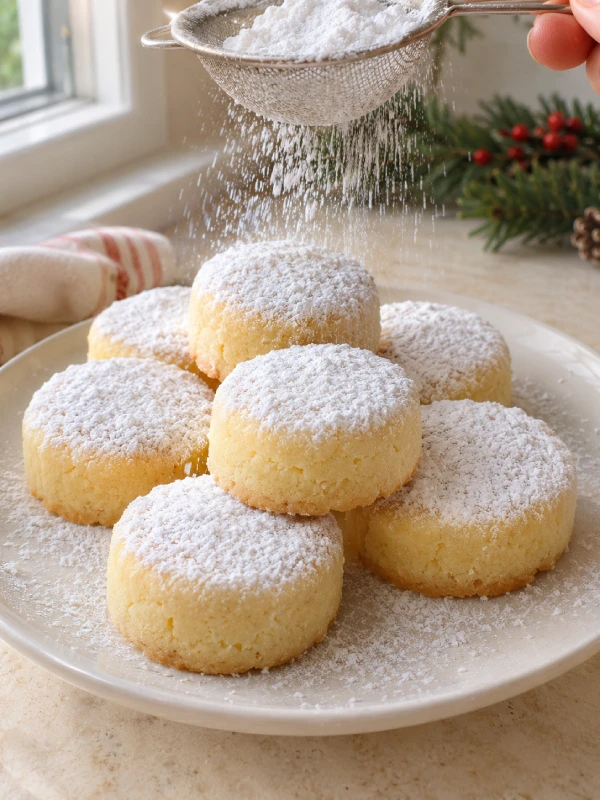
Sift powdered sugar generously over the tops. Some sugar will settle into the small surface cracks, giving the cookies the snowy appearance shown in your reference.
For a colorful addition to the serving plate, pair them with raspberry cookies. Raspberry cookies.
Tips for Tender Melting Moment Logs
Keep the Dough Soft Enough to Shape
If chilled dough cracks when pressed, let it sit at room temperature briefly. It should feel pliable enough to shape with light pressure.
If the dough sticks to your fingers or looks greasy, refrigerate it for 10 minutes before continuing.
Use Consistent Portions
A small kitchen scale helps keep the cookies evenly sized.
If you shape them by eye, compare the first few cookies and adjust them before chilling. Thick portions may need longer in the oven.
Watch the Bottoms
The tops can stay pale even when the cookies are ready.
Near the end of baking, gently lift one with a thin spatula. A lightly golden underside is a useful cue.
Let the Cookies Cool Before Dusting
Powdered sugar can disappear into a warm surface. Cooling first helps the topping stay visible.
For gift boxes, add another light dusting shortly before packing.
Handle Gently
Freshly baked Melting Moment Logs are delicate. Give them the full resting time on the baking sheet before moving them.
For a holiday assortment with a sturdier, chewy option, add oatmeal raisin cookies. Oatmeal raisin cookies.
Flavor Variations
Lemon Vanilla
Add 1 teaspoon of finely grated lemon zest with the vanilla. Keep the powdered sugar finish for a simple appearance.
Orange Butter
Add 1 teaspoon of finely grated orange zest to the dough. The citrus fragrance works well with the rich butter flavor.
Almond Vanilla
Replace ¼ teaspoon of the vanilla with almond extract. A small amount gives the dough a gentle almond flavor.
Cinnamon Sugar Dusting
Mix a small pinch of cinnamon into the powdered sugar used for finishing. Sift it over completely cooled cookies.
Serve a few variations together, or add a fruit-flavored cookie to the platter. Strawberry shortcake cookies.
Make-Ahead and Storage Tips
Prepare the dough for Melting Moment Logs up to two days ahead. Wrap it tightly and refrigerate. Before shaping, let it soften just enough to press and roll smoothly.
You can also freeze shaped dough on a lined tray. Once firm, transfer the pieces to an airtight container and freeze for up to two months. Bake from frozen, allowing a few extra minutes and checking for lightly golden bottoms.
Store the baked cookies in an airtight container at cool room temperature for up to five days. Place parchment between layers to protect their delicate surfaces.
For longer storage, freeze cooled, undusted cookies for up to two months. Thaw in their closed container, then add powdered sugar before serving.
If you’re filling several gift tins, choose cookies with different shapes and textures from the archive. We Post Recipes cookie collection.

Melting Moment Logs
Ingredients
Equipment
Method
- Line two baking sheets with parchment paper and set them aside. Prepare a wire cooling rack and a small fine-mesh sieve for dusting the finished cookies with powdered sugar. Measure all ingredients before mixing, keeping the powdered sugar for the dough separate from the powdered sugar for decorating.
- In a medium mixing bowl, whisk together 1 1/2 cups (approximately 180 grams) of all-purpose flour, 1/2 cup (approximately 60 grams) of cornstarch, and 1/4 teaspoon of fine salt. Break up any visible lumps, especially in the cornstarch, and mix until the dry ingredients are evenly combined. Set the bowl aside.
- Place 3/4 cup (approximately 170 grams) of softened unsalted butter and 1/2 cup (approximately 60 grams) of powdered sugar in a large mixing bowl. Beat with an electric mixer on medium speed for approximately 2 minutes, until the mixture is smooth, creamy, and slightly lighter in color. Scrape the sides and bottom of the bowl, then add 1 teaspoon of vanilla extract and mix until completely incorporated.
- Add the prepared flour, cornstarch, and salt mixture to the creamed butter in two additions. Mix on low speed just until the dough begins to gather. Finish mixing with a flexible spatula, gently pressing the mixture together until a soft, cohesive dough forms. Avoid overmixing. If the dough seems crumbly, squeeze a small portion in your hand to check whether it holds together, then press the remaining dough into one mass.
- Divide the prepared dough into 24 equal portions, approximately 20 grams each. Shape every portion into a short, thick cylinder about 1 1/4 inches wide and 3/4 inch tall. Gently flatten the top and smooth the rounded sides with your fingertips. Arrange the cookies approximately 2 inches apart on the prepared baking sheets. Keep the portions evenly sized so they bake consistently.
- Refrigerate the shaped Melting Moment Logs for 30 minutes to help them maintain their shape during baking. While the dough chills, preheat the oven to 325°F (163°C). Keep the second tray refrigerated while the first tray is baking. If the shaped dough becomes sticky or greasy, refrigerate it until firm before placing it in the oven.
- Bake one tray at a time on the middle oven rack at 325°F (163°C) for approximately 18 to 22 minutes, beginning to check at 18 minutes. The cookie surfaces should appear dry and set, while the bottoms should be lightly golden and the tops remain pale. Carefully lift one cookie with a thin spatula to check the underside near the end of baking. Remove the tray from the oven and let the cookies rest on the baking sheet for 10 minutes. Transfer them carefully to a wire cooling rack and allow them to cool completely before decorating.
- Arrange the completely cooled Melting Moment Logs on parchment paper or a serving plate. Place approximately 1/4 cup of powdered sugar in a fine-mesh sieve and dust it generously over the tops of the cookies. Allow the sugar to settle into the small surface cracks to create a snowy appearance. Serve immediately or store in an airtight container at cool room temperature with parchment between layers. If preparing the cookies ahead, add another light dusting of powdered sugar just before serving.
Notes
Frequently Asked Questions
Why Are My Melting Moment Logs Crumbly?
Too much flour or cornstarch can make the dough dry. Measure carefully, then mix until the dough holds together when squeezed. A few gentle presses with a spatula may help gather loose crumbs.
Why Did My Cookies Spread?
The butter may have been very warm, or the shaped dough may have needed more chilling. Refrigerate the cookies for the full 30 minutes and use a fully preheated oven.
Can I Make Melting Moment Logs Ahead?
Yes. Refrigerate the dough for up to two days or freeze the shaped portions for up to two months. You can also bake the cookies ahead and dust them shortly before serving.
Can I Double the Recipe?
Yes. Double all ingredients and divide the dough into 48 portions. Bake in batches, keeping the waiting trays refrigerated.
Why Did the Powdered Sugar Disappear?
The cookies may have been warm when dusted, or moisture may have dissolved some of the sugar during storage. Let them cool completely and add a fresh dusting before serving.
A Snowy Addition to Your Christmas Cookie Plate
Melting Moment Logs bring buttery vanilla flavor and a delicate texture to the holiday table. Their thick shape and powdered sugar tops make them easy to arrange on a plate or nestle into a gift tin. Let them cool fully, dust generously, and serve with your favorite warm drink.
Find more recipes to round out your Christmas menu in the dessert collection. Dessert & Baking recipes.